Create a complaint website to get your message out and organize fellow victims
– then defend it from eventual digital and legal attacks
Creating a website isn’t as hard as it seems
Many people assume that you have to know how to code with one of various programming languages in order to create a website – while might have largely been the case 15+ years ago, that’s no longer true today. Instead, most websites operate on Content Management Systems (CMS) which are intended to be used by anyone with even moderate knowledge of how to operate a website: for instance, if you can create and maintain a Facebook profile for yourself, you can create and maintain a website using a CMS.
The guide below will provide you with step-by-step guidance on obtaining a web domain, creating a website using a CMS, then defending it from digital and legal attack.
Registering a Domain Name using GoDaddy
GoDaddy.com is the world’s #1 domain name registrar, in large part because it’s quick, easy to use, and competitively priced. For this reason, the following guide assumes you are using GoDaddy to register your domain, but you could use another registrar like CloudFlare, IONOS, or Google.
- Visit GoDaddy.com in your web browser.
- Start searching for available domains that contain the name of the company. For instance, if the company in question was ABCCorp, you might check to see whether ABCCorpComplaints.com was available, or VictimsOfABCCorp.com.
Note: You might think that this opens you up to attack; well, it does, but in a way you can win. At some point the company may file a complaint with ICANN alleging copyright infringement, but there is established precedent for your right to operate a complaint website using the company’s name in the domain, explained in our later Responding to ICANN Complaints section. - After finding a suitable web domain, add it to your cart, and checkout. We would also recommend finding a second domain and adding it to your cart before your check-out. While this is not necessary to continue, it will protect you in the event the domain is locked during dispute (or less likely event it is seized). Domain registrations are under $20/year per domain, so registering a second is an inexpensive insurance policy.
After you checkout, you are now ready to begin building your website itself. We will return to GoDaddy later to finish setup, but for now just make sure you know your account information and can log back in when the time comes.
Creating the site itself using WordPress
Just as GoDaddy is the #1 registrar in the world, WordPress is the #1 Content Management System (CMS) for websites in the world. While WordPress, itself, is a free and open source platform, hosting it is not free (at least not generally), nor without maintenance overhead – at least if you want a system that performs well and can handle a lot of visitors. Therefore, while you can use other CMS platforms like Joomla or Drupal, and you can host your site at a multitude of providers (including at WordPress.com), this guide will show how to create a Managed WordPress installation using our preferred hosting provider, Flywheel. Flywheel’s Tiny Plan as of the time of this writing is only $13/month.
Why WordPress? There are easier ways to get a website online, including various “free website builder” applications that come with various hosting platforms; however, we consider WordPress the best option for this purpose because of its rich plug-in library which allows for plug-and-play features like Google Search Console integration, spam protection, and integrated user forums that you will likely want later as the site grows.
- Visit the Flywheel pricing page at https://getflywheel.com/pricing in your browser.
- Click the button to Get Started with Flywheel’s Tiny Plan.
- Complete the steps of Flywheel’s sign-up wizard to enter your contact info, billing info, and preliminary website details.
- Wait for Flywheel to finish setting up your website following sign-up; it usually only takes a few minutes.
- Launch over to the WordPress Administration interface using the WP Admin button near the top-right of the page.
- This will bring you into the WordPress interface, which you will actually use from here to build the pages of the site.
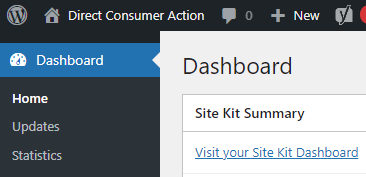
- Inside the WordPress administrative interface, you can pretty much accomplish everything you need to do by getting to know the navigation panel that runs down the left-hand side of the screen. For more in-depth tutorials on building out your site to get it exactly as you want it, we highly recommend the materials available in the WordPress Learning Center:
Protect your site from Distributed Denial of Service (DDoS) attacks using CloudFlare
If the company you are up against has abused you, there’s a good chance their unethical behavior extends to The Internet. If they are willing to put ethics aside, the most inexpensive avenue for a company to try to silence your website is to pay a shady assortment of characters online to take it down through questionable or downright illegal means. The most common example is such an attack is a Distributed Denial of Service (DDoS) attack.
What is a DDoS attack?
A DDoS attack is a coordinated swarm of visits to a website intended to overwhelm it and make it inaccessible to people trying to access it legitimately. This means that so many different people – or, in many cases, bot-controlled-computers – are attempting to access the website that the servers hosting it can’t keep up with everyone and ultimately crash. Basically, the company can simply target your website, tell a bunch of bots to access it constantly, and no one will
How does CloudFlare protect your site?
Essentially, CloudFlare acts as a buffer between your website and the rest of The Internet: when someone attempts to visit your website, first they land on CloudFlare’s servers before being redirected to your normal website host and your site’s content – but without actually noticing. However, if a bunch of bots start trying to access your site, CloudFlare creates an actual page that visitors see, preventing bots from getting through to your site, but allowing legitimate visitors to see it.
Setup a free CloudFlare account and point it to your site
The good news is that CloudFlare offers free accounts for personal websites, so just be sure to choose CloudFlare Personal as your tier when signing up and it won’t cost you anything to use.
- Visit https://www.cloudflare.com/
- Click the Get Started Free box in the middle of the page
- Create a new Username and Password
- Follow the onscreen instructions, being sure to select the option for CloudFlare Personal during sign-up
- When asked for your domain provider, select GoDaddy and follow the on-screen instructions for pointing your GoDaddy domain to your new CloudFlare account.
- This will involve revisiting your GoDaddy account, accessing the My Products > My Domains section, and choose the option to Manage DNS on your domain; there, following the instructions provided by CloudFlare, change the Nameservers to point to the two name servers which CloudFlare provides.
Revisit Flywheel to point it to CloudFlare and take your site live
Now that you have configured CloudFlare, your site is safe to take online without worrying about bad actors taking it down with a DDoS attack. This involves revisiting your Flywheel account and using the DNS setup wizard to configure CloudFlare, so you will need the login information for both services to complete the following steps.
- Login to your Flywheel account at https://app.getflywheel.com/
- Go to the My Sites area, click into your site, and view the Overview tab.
- You should see an area at the top left for Domains, so click the + (plus-sign) to add a new domain.
- Type in the domain you registered with GoDaddy on the first step, but for the rest of the steps complete the actual actions in CloudFlare.
- Once you follow and complete the on-screen instructions for the remainder of the process, your site should now be online at your web domain.
Congratulations!
Prepare for a potential future challenge against your domain name via ICANN
There may come a time where, rather than attempt to negotiate for you and allow you to have any leverage over them through your website, the company may attempt to file a complaint against your domain name, perhaps alleging that it infringes upon their trademark (particularly if your domain contains a reference to a trademarked term). Therefore, you will want to be ready with a response you can send back yourself without incurring any unnecessary legal fees.
Coming SOon: Ready-Made Response TEmplate for ICANN Domain name challenges
Coming Soon To This Guide:
- Ready-to-go response template for challenges to your domain name via ICANN
- Connecting your website to the Google Search Console (GSC) and Bing Webmaster Tools for Search Engine Optimization (SEO) purposes
- Writing content using the Yoast SEO plug-in that will boost your site rankings and get the company noticing it